

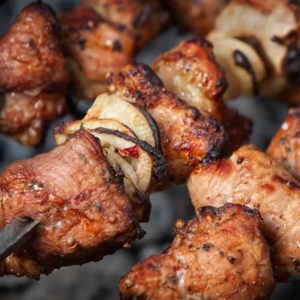
Crackling is a moisture problem, not a heat problem. Skin that still holds water will not blister however hot your oven runs, because the water has to leave before the skin can puff. So you dry it: score the skin, salt it, and leave the slab uncovered in the fridge overnight. Then roast in two stages, low to cook the meat, high at the end to blow the skin into glass.
The usual problem. The pork comes out looking right. You tap the skin and it gives instead of cracking. Or half the slab is glass and the other half is leather you have to saw through. The skin decides whether the dish worked, and it is the part nobody tells you how to control.
Why moisture is the enemy
Pork skin is collagen and water. To turn it into crackling you drive the water off, then get the collagen that is left hot enough to puff and set rigid. Those two things happen in that order and they cannot overlap. While there is water in the skin, the surface sits near boiling, because evaporating water soaks up every bit of heat you put in. The skin steams, goes pale and rubbery, and stays that way at 220C.
Get the water out first and the skin has nothing left to spend heat on. The temperature climbs fast, the fat under the skin renders and bubbles up through it, and the sheet blisters. Everything below serves that one sequence.
Start with the right slab
You want belly with the skin on, even thickness, and a decent fat layer directly under the skin. Thin, patchy fat gives skin nothing to fry in, and those spots come out leathery. A 1 to 1.5kg piece is the easy size for a home oven. This is belly work rather than shoulder work: the mookata comparison covers where each cut wins. Frozen belly is fine. Thaw it in the chiller over a day, which leaves the skin firm and easy to score.
The overnight rest does most of the work
Pat the skin bone dry with kitchen paper. Then put the slab on a rack over a tray, skin side up, and leave it uncovered in the fridge overnight. Twelve hours is enough. Twenty-four is better.
Your fridge is a dehumidifier with a fan in it. Uncovered, the moving air pulls moisture off the skin steadily, and by morning the skin feels tight and slightly papery, close to parchment. That texture is the best predictor of the crackling you are going to get.
This is the step people skip, because it needs planning rather than skill. With only two hours, dry the skin, salt it, blot the beaded moisture off, and repeat every half hour. A slab left on the counter under a fan is not the answer: two hours is the limit for raw pork at room temperature, and you hit it before the skin is dry.
Score deep, salt twice
Score the skin in lines about 1cm apart, or in a diamond. What matters is depth. Cut through the skin and into the fat, and stop before the meat. If your knife touches meat, juices come up through the cuts and wet the skin from below, the thing you spent the night preventing. Skin still firm from the chiller scores more cleanly, so score it cold with a sharp fine-pointed knife.
Then rub coarse salt over the dry skin and work it into the lines. Salt pulls more water out, seasons the skin, and keeps the surface dry through the roast. Salt before the overnight rest, wipe the wet salt off in the morning, and re-salt lightly before it goes in. Season the meat sides separately with five spice, white pepper and soy if you like, but keep liquid marinade off the skin. One dribble of soy up there becomes one leathery patch.
The two-temperature roast
- Oven to 160C. Roast skin side up on a rack, about 1 hour 30 minutes for a 1.2kg piece, until a skewer meets light resistance and the skin is dry and pale.
- Take it out. Blot any fat sitting on the skin with kitchen paper, and re-salt lightly if the salt has washed off.
- Oven up to 230C, or as high as it goes. Return the pork to the top third.
- Watch it for 20 to 30 minutes. The skin bubbles in patches first, then the puff spreads. It is done when the whole sheet has risen and gone the colour of dark honey.
- If patches refuse to puff, move the tray so they sit under the hottest part of the oven, or run the grill over them for a minute. Do not walk away here.
The low stage cooks the meat and renders the fat. The high stage is the puff. One temperature for both forces a choice between undercooked meat with good crackling and cooked meat with tired skin.
What goes wrong, and what it looks like
- Leathery patches. Almost always a wet spot. Liquid pooled in the tray and splashed up, marinade ran onto the skin, or that part sat against the tray wall and could not dry. Roast on a rack and keep standing liquid out of the tray.
- Uneven puff. Home ovens have hot spots and belly is rarely a flat slab. The thin end dries and puffs first. Turn the tray around halfway through the high stage, and finish any lagging region under the grill.
- Chewy instead of crisp. The skin cooked but never got hot enough for long enough to set. A timid final stage. 230C for 25 minutes does something 200C for 40 minutes will not.
A slab that did not dry properly is not wasted. Braise it instead: soy sauce braised belly wants the skin soft and silky, so failed crackling is the right starting point.
Resting and cutting
Rest the slab 10 to 15 minutes, uncovered. Foil traps steam and steam softens crackling, so leave it bare on a board. Cut skin side down with a heavy sharp knife, pressing through the skin first. Cutting skin side up shatters the crackling and squashes the meat.
The fat left in the tray is worth keeping. Strain it warm into a clean jar and you have the same cooking fat you get from rendering pork lard on the stove, and it does the same work in fried rice and noodles.
Skin-on belly, one even slab
Frozen belly with the skin on and a proper fat layer under it. Dry it overnight, and the oven does the rest.